1.向Google GCM Server 註冊 Registration ID
2.GCM 會回傳 一組獨一無二的Registration ID
3.把Registration ID 傳給我們的User Server
4.User Server 裡用這組ID 傳送訊息給GCM
最後GCM 就會把訊息傳給各個 Android Mobile
一. 申請
首先GCM 為免費的服務平台、每封訊息最大4KB、訊息的存活最長時間為4週(2419200秒)
1.需要有一個Google 帳號
2.開啟GCM Project http://developer.android.com/google/gcm/gs.html
3.記住Sender ID
4.開啟GCM 服務
<?xml version="1.0" encoding="utf-8"?>
<manifest xmlns:android="http://schemas.android.com/apk/res/android"
package="com.example.pushnotification"
android:versionCode="1"
android:versionName="1.0" >
<uses-sdk
android:minSdkVersion="8"
android:targetSdkVersion="16" />
<permission android:name="com.example.pushnotification.permission.C2D_MESSAGE" android:protectionLevel="signature" />
<uses-permission android:name="com.example.pushnotification.permission.C2D_MESSAGE" />
<!-- App receives GCM messages. -->
<uses-permission android:name="com.google.android.c2dm.permission.RECEIVE" />
<!-- GCM connects to Google Services. -->
<uses-permission android:name="android.permission.INTERNET" />
<!-- GCM requires a Google account. -->
<uses-permission android:name="android.permission.GET_ACCOUNTS" />
<!-- Keeps the processor from sleeping when a message is received. -->
<uses-permission android:name="android.permission.WAKE_LOCK" />
<application
android:allowBackup="true"
android:icon="@drawable/ic_launcher"
android:label="@string/app_name"
android:theme="@style/AppTheme" >
<activity
android:name=".MainActivity"
android:label="@string/app_name" >
<intent-filter>
<action android:name="android.intent.action.MAIN" />
<category android:name="android.intent.category.LAUNCHER" />
</intent-filter>
</activity>
<service android:name=".GCMIntentService" />
<receiver android:name="com.google.android.gcm.GCMBroadcastReceiver" android:permission="com.google.android.c2dm.permission.SEND" >
<intent-filter>
<action android:name="com.google.android.c2dm.intent.RECEIVE" />
<action android:name="com.google.android.c2dm.intent.REGISTRATION" />
<category android:name="com.example.pushnotification" />
</intent-filter>
</receiver>
</application>
</manifest>
2.建立GCMIntentService物件
public class GCMIntentService extends GCMBaseIntentService {
public static final String SENDER_ID = "123456789";
public GCMIntentService(){
super(SENDER_ID);
}
@Override
protected void onError(Context arg0, String arg1) {
}
@Override//收到傳送過來的訊息 產生一個 Notitfication通知
protected void onMessage(Context arg0, Intent arg1) {
NotificationManager myNotificationManager = (NotificationManager)arg0.getSystemService(Context.NOTIFICATION_SERVICE);
int icon = R.drawable.ic_launcher;
CharSequence tickerText = "Hello";
long when = System.currentTimeMillis();
Notification myNotification = new Notification(icon,tickerText,when);
Context context = getApplicationContext();
CharSequence contentTitle = "My notification";
CharSequence contentText = "Hello World!";
Intent notificationIntent = new Intent(this, MainActivity.class);
PendingIntent contentIntent = PendingIntent.getActivity(this, 0, notificationIntent, 0);
myNotification.icon = R.drawable.ic_launcher;
myNotification.flags = Notification.FLAG_AUTO_CANCEL;
myNotification.setLatestEventInfo(context, contentTitle, contentText, contentIntent);
myNotificationManager.notify(1, myNotification);
Log.i("asdf",""+myNotificationManager);
}
@Override//註冊ID
protected void onRegistered(Context arg0, String arg1) {
//arg1 GCM 回傳回來的Registration ID //在此可以將Registration ID 回傳 User Server
Log.i("bbbbbb",arg1);
}
@Override
protected void onUnregistered(Context arg0, String arg1) {
}
}
3. 建立Activity 呼叫 GCMIntentService
public class MainActivity extends Activity {
private Button RegisteringC2DM;
private Button UnregisteringC2DM;
private static final String TAG = "MainActivity";
@Override
protected void onCreate(Bundle savedInstanceState) {
super.onCreate(savedInstanceState);
setContentView(R.layout.activity_main);
findViewById();
Log.i(TAG,"regId = "+regId);
setRegisteringC2DM();
setUnregisteringC2DM();
}
private void findViewById() {
RegisteringC2DM =(Button)findViewById(R.id.RegisteringC2DM);
UnregisteringC2DM =(Button)findViewById(R.id.UnregisteringC2DM);
}
private void setRegisteringC2DM() {
RegisteringC2DM.setOnClickListener(new View.OnClickListener() {
@Override
public void onClick(View v) {
//註冊
GCMRegistrar.checkDevice(this);
GCMRegistrar.checkManifest(this);
String regId = GCMRegistrar.getRegistrationId(this);
if(regId.equals("")){
GCMRegistrar.register(MainActivity.this, GCMIntentService.SENDER_ID);
}
Log.i(TAG,"RegisteringC2DM onClick");
}
});
}
private void setUnregisteringC2DM() {
UnregisteringC2DM.setOnClickListener(new View.OnClickListener() {
@Override
public void onClick(View v) {
//取消註冊
Intent unregIntent = new Intent("com.google.android.c2dm.intent.UNREGISTER");
unregIntent.putExtra("app", PendingIntent.getBroadcast(this, 0, new Intent(), 0)); startService(unregIntent); Log.i(TAG,"UnregisteringC2DM onClick");
}
});
}
@Override
public boolean onCreateOptionsMenu(Menu menu) {
// Inflate the menu; this adds items to the action bar if it is present.
getMenuInflater().inflate(R.menu.activity_main, menu);
return true;
}
}
三. Server 端 傳送Message
Libary:Build Path
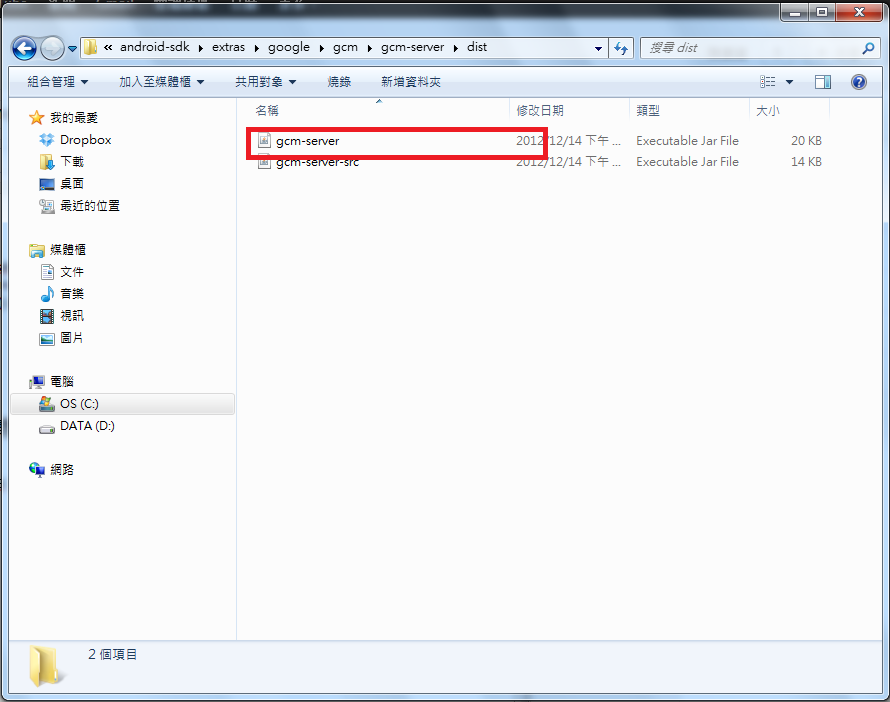
需要將gcm-server.jar 放到libs 資料夾

Java Build Path gcm-server.jar
1.權限的註冊
<?xml version="1.0" encoding="utf-8"?>
<manifest xmlns:android="http://schemas.android.com/apk/res/android"
package="com.example.pushnotificationserver"
android:versionCode="1"
android:versionName="1.0" >
<uses-sdk
android:minSdkVersion="14"
android:targetSdkVersion="16" />
<uses-permission android:name="android.permission.INTERNET"/>
<application
android:allowBackup="true"
android:icon="@drawable/ic_launcher"
android:label="@string/app_name"
android:theme="@style/AppTheme" >
<activity
android:name="com.example.pushnotificationserver.MainActivity"
android:label="@string/app_name" >
<intent-filter>
<action android:name="android.intent.action.MAIN" />
<category android:name="android.intent.category.LAUNCHER" />
</intent-filter>
</activity>
</application>
</manifest>
2.建立Activity 傳送Message
public class MainActivity extends Activity {
private Button getToken;
private Button sendMessage;
@Override
protected void onCreate(Bundle savedInstanceState) {
super.onCreate(savedInstanceState);
setContentView(R.layout.activity_main);
getToken = (Button)findViewById(R.id.getToken);
getToken.setOnClickListener(new View.OnClickListener() {
@Override
public void onClick(View v) {
new Thread(new Runnable(){
@Override
public void run() {
String devices = "APA91bEFZLsH0Pbbd6u0j8JszJ33pB9zn2WpcPJ6nz0eVGtPwk24IRFvLOHVc1LiljIwxPqfSQOGKLZHKBzeGerSR0FUAXBykUDkR3Dwij9nUgHzJcdMEIG3_fG_Kqq8g8BmLiaXH4AXS2x3X6K";//Client 端的 Registration ID
Sender sender = new Sender("AIzaSyBESI-p6XynQoKvKSt9EKIaIP2lTDZc");// Android API KEY
Message message = new Message.Builder().addData("message", "123456").build();//傳送的訊息
Result result = null;
try {
result = sender.send(message, devices, 5);
} catch (IOException e) {
// TODO Auto-generated catch block
e.printStackTrace();
}
if (result.getMessageId() != null) {
Log.i("result", "getMessageId = "+result.getMessageId());
String canonicalRegId = result.getCanonicalRegistrationId();
Log.i("canonicalRegId", "canonicalRegId = "+canonicalRegId);
}
}
}).start();
}
});
}
@Override
public boolean onCreateOptionsMenu(Menu menu) {
// Inflate the menu; this adds items to the action bar if it is present.
getMenuInflater().inflate(R.menu.activity_main, menu);
return true;
}
}
Libary:Build Path
需要將gcm-server.jar 放到libs 資料夾

Java Build Path gcm-server.jar
1.權限的註冊
<?xml version="1.0" encoding="utf-8"?>
<manifest xmlns:android="http://schemas.android.com/apk/res/android"
package="com.example.pushnotificationserver"
android:versionCode="1"
android:versionName="1.0" >
<uses-sdk
android:minSdkVersion="14"
android:targetSdkVersion="16" />
<uses-permission android:name="android.permission.INTERNET"/>
<application
android:allowBackup="true"
android:icon="@drawable/ic_launcher"
android:label="@string/app_name"
android:theme="@style/AppTheme" >
<activity
android:name="com.example.pushnotificationserver.MainActivity"
android:label="@string/app_name" >
<intent-filter>
<action android:name="android.intent.action.MAIN" />
<category android:name="android.intent.category.LAUNCHER" />
</intent-filter>
</activity>
</application>
</manifest>
2.建立Activity 傳送Message
public class MainActivity extends Activity {
private Button getToken;
private Button sendMessage;
@Override
protected void onCreate(Bundle savedInstanceState) {
super.onCreate(savedInstanceState);
setContentView(R.layout.activity_main);
getToken = (Button)findViewById(R.id.getToken);
getToken.setOnClickListener(new View.OnClickListener() {
@Override
public void onClick(View v) {
new Thread(new Runnable(){
@Override
public void run() {
String devices = "APA91bEFZLsH0Pbbd6u0j8JszJ33pB9zn2WpcPJ6nz0eVGtPwk24IRFvLOHVc1LiljIwxPqfSQOGKLZHKBzeGerSR0FUAXBykUDkR3Dwij9nUgHzJcdMEIG3_fG_Kqq8g8BmLiaXH4AXS2x3X6K";//Client 端的 Registration ID
Sender sender = new Sender("AIzaSyBESI-p6XynQoKvKSt9EKIaIP2lTDZc");// Android API KEY
Message message = new Message.Builder().addData("message", "123456").build();//傳送的訊息
Result result = null;
try {
result = sender.send(message, devices, 5);
} catch (IOException e) {
// TODO Auto-generated catch block
e.printStackTrace();
}
if (result.getMessageId() != null) {
Log.i("result", "getMessageId = "+result.getMessageId());
String canonicalRegId = result.getCanonicalRegistrationId();
Log.i("canonicalRegId", "canonicalRegId = "+canonicalRegId);
}
}
}).start();
}
});
}
@Override
public boolean onCreateOptionsMenu(Menu menu) {
// Inflate the menu; this adds items to the action bar if it is present.
getMenuInflater().inflate(R.menu.activity_main, menu);
return true;
}
}


